Showing posts with label Make Up. Show all posts

Make Up Monday: Kat Von D Tattoo Eyeliner in Trooper

First Make Up Monday with the new format. EEEEEK! Just a little excited. If you have no clue what I am talking about you can read my previous Make Up Monday blog that explains what is going on. If you already read that, then let's continue.


First Impression: 
My first impression of this was based on the brand. I've tried lip gloss, lip stain and eye shadow by Kat Von D and I was not let down by those products. Plus the gal at Sephora said she was wearing it and it looked good on her. My first impression was "oh yeah this is going to be fantastic."


Ease of Use:
This is maybe the best feature of the eyeliner. It is so easy to use. The gradual point of the eyeliner makes it easy to draw thin lines or you have the option of making your eyeliner thicker. It really just depends on your taste or the occasion. It is also fabulous for making wings for that cat eye look that is always in style.


Price:
The price for this is $18 at Sephora. That's not too bad considering that her other products all fall in the same range. Sephora brands liquid eyeliner is $12 and the liquid black eyeliner from Mac is $17. So there are products that are similar out there that are cheaper.

Quantity:
The tip is instantly loaded with a lot of the actual eyeliner on it. However, I have found that from the very beginning I would need to go over my line once or twice after my initial application because for me, it was too thin, almost as thought it was at the end of the barrel. Even if I tip it down and shake it, you know so the liquid goes down into the tip like you would a pen. It didn't help.


Packaging:
The packaging is very simple and small. I love that it is a consistent shape unlike some of the others I have purchased in a liquid eyeliner. Sephora and Mac have little bulbous pots at the bottom. While it's not a big deal I feel like I can fit more stuff in my make up bag with this eyeliner not taking up a lot of space.


Would Re-Use:
I have been using it since I got it. I used it in my review of Yes To Tomatoes Make Up Removing Wipes and I also had it in my make up bag earlier this month. I like the ease of use and the packaging. My only complaint is that it is not very durable and though it is supposed to be waterproof it does tend to smudge after a long day. I will re-use this unless I fall in love with something else.

Recommend:
I highly recommend this for anyone who is wanting to try using liquid eyeliner for the first time. The only way to be able to master the art of using liquid eyeliner is to practice. With this eyeliner you can hold it like you would a pencil eyeliner and drag it across your eye in short strokes, taking care to not blink or blink in between "strokes" so that you don't end up with weird dots all along your eyes. Plus, one some of the other liquid liners when you pull the applicator out of the pot or use an eyeliner brush a lot of the liquid can get on there and that's what I think discourages people from using it because it ends up being ridiculously think in some spots or uneven on the eyes.

Overall Score:


That's it for this week's Make Up Monday. Next week there will be a hair tutorial. After all, hair goes with make up! Also if you buy anything I review because of the review, take a picture with it on and tag me on any social media. I'd love to see your photos! 

Based on what you've read will you try this product?
What do you think of the new Make Up Monday format? Thumbs up or Thumbs Down?

Make Up Monday: Cracked Nail Polish

Hi, so I'm tardy to the party with this post. By that I mean I'm using a trend from the past, rather than the post being late. Weird huh? Anyways, I was looking through my nail polish bin and I discovered some cracked nail polish that I must have bought but never actually used.


This is 20I2 in Savior over Sally Hansen's Diamond Strength Nail Polish in Black Diamond. At first I hated it. As in I wasn't even going to do the other hand. But then after maybe a half hour I decided it wasn't so bad. Now I' pretty much in love with it. That and the fact that I found the same stuff in black in the bottom of the bin (my bin is huge) and now I want to use white as a base and put the black over it and call it Zebra. If you follow me on Instagram (@saarrraaaaivy) and I decide to do it you'll get the first look!

What do you think of cracked nail polish?
Hot or not?

Make Up Monday: My Top Five Make Up Tips

Sometimes I like to share things I've picked up along the way. Maybe you've heard of these and maybe you haven't but hopefully these will help one of you guys out and that's what counts right? I'm going to share my top five (not in order of course) make up tricks and tips that I've learned.

1. I sometimes get asked by my friends how to do things or how to make certain features stand out. I used to spend A LOT of time focused on my eyes as I was convinced they were my best feature. One of my favorite eye tricks is as follows. Dab a small amount of shimmery white eye shadow on the inside corner of your eyes. This will make them seem more open and make you seem more awake.


2.  As I've gotten older I've discovered that I like to wear lipstick to work and down play my eyes. As such I've ventured into the red lipstick wearing crowd. One huge tip I learned is when you are going to wear bright red or pink lipstick, apply the lipstick first then your blush so you don't end up looking clown-like.


3. When selecting a highlighter for your eye brow use light pink rather than white shimmer. Also make sure to spread it under your whole eye brow rather than just in the arch.


4. Don't have (INSERT COLOR) Eyeliner? Use a wet angled brush and dip it into an eye shadow that you'd like to use as eyeliner. Then use a setting spray when you're done. Instant custom-color eyeliner.


5. Apply Shimmery eye shadow in a matching shade over your lipstick for a highlight. Apply a matte eye shadow in a matching shade to make your lipstick matte.


That is it for today Make Up Monday. I hope you enjoyed it and be sure to let me know if you use any of the tips. If you have tips to share leave them in the comments!

What's your favorite trick you've learned for make up application?

Make Up Bag Monday: May Edition

Hi, so it has been some time since I have shown you what is in my make up bag and this is the first Make Up Monday of May! (Holy alliteration!) You can view my last Make Up Bag Monday post to see how different the two are.


1. Sephora Powder Foundation
3. Sephora Collection Eyeshadow
5. NYC Eyelash Curler
7. Yes to Carrots Lip Balm
8. Mini Kabuki Brush
9. Tweezers
10. Kat Von D Liquid Eyeliner
13.  Eye Shadow Brush
15. MAC Make Up Remover Q-tips (Not pictured - ran out)


Some of these I still have to review. For example I haven't done a review of the Kat Von D eyeliner I currently have in there. I'm still testing it out but a lot of these are old favorites or I reviewed them together. Then there's #15 which I have had forever (also from my last Make Up Bag Monday) and normally have in my make up bag but I used my last one the other day and have yet to go find some at my local MAC store. It's on my weekend/payday to-buy list.

What's in your make up bag?
Interested in doing a Make Up Bag Monday Guest Blog? E-mail me!

Make Up Monday: Yes To Tomatoes Acne Wipes

Ok two things: First, my head is literally about to explode my headache is so severe. I have my laptop contrast so low that if I lower it once more the screen goes black so excuse me for making this really short and sweet. I was going to put it off until after I got off work but figured I'd either forget or be too tired. So it was no post or short post. ;) And Second, I LOVE my new camera. These pictures were taken with it and I am so in love.

Remember back when I first introduced you to the Yes To... brand? I was using the ones for sensitive skin because my skin is crazy sensitive. Well, lately I've been having a huge issue with my skin drying out and flaking and also with a resurgence of acne. I honestly feel like I'm in high school again. It's pretty horrifying.


So I decided to try the Yes To Tomatoes wipes. I just started using them and I see a small difference but like with most things it takes time for it to work. Someone remind me to take pictures in a few weeks and I'll show you the difference between then and now.

Duckface - Testing out my camera this morning ;)


Mid-use. I told you guys, I'm having too much fun with this camera.

This is what I look like without "my face" on. LOL

Aren't those so much better than my cellphone pictures of the past? Yeah, me too. So that's it for this week's Make up Monday. I know, I said it was short. Don't hate me. I'll do a super-duper amazing one next week and make up for it.

Also, last week someone commented about the BB creams and I accidentally deleted it instead of publishing it.
"I've been wondering about the BB cream myself. I don't usually put on a full face when I go to work - takes too much time. I'm a Bare Essentials girl myself. Did the find BB light on the face? And was it oily?

Wondering if I could pull it off when I need a quick face. :)

Thanks for sharing!"
To answer your question: I've been bouncing back and forth between two BB creams. I bought Loreal's and I liked that one much better. The cream itself is not oily, however I have oily skin naturally so if I don't wash my face before putting it on it does come off oily. It doesn't make your face feel heavy at all because it is doing 4 things: SPF, moisturizer, foundation and concealer. So you're putting less product on your face by using a BB cream.

The one I wore today was Smashbox's BB cream. It is very light as you can see in the photograph above, it isn't extremely dark and there isn't a lot of it. BB creams should be re-applied every 4-6 hours the same way sunblock is done. I typically go all day wearing mine and only freshen up for dates or special events.

Thanks for your question!

Make Up Monday: Sephora Lip Stain


So last Friday I had yet another date. Complete waste of the hair and make up from above but I got a free dinner out of it ;) The guy spent the whole time on his cellphone texting his sister or watching the soccer game behind me and then at the end decided to tell me there was a girl two hours away who had his heart but neither of them could do the distance. OI! I think I might start writing a hilarious dating column on here because let's face it, dating horror stories amuse everyone and they are definitely not in short supply. Anyways, I thought I'd share with you the fabulous lip color that I am using here.

Remember forever ago when I did a review of various lipsticks? I have quite a few but I've never really been a lipstick kind of girl. I am more recently becoming one. I think it is because in the past I have been very concentrated on my eyes. Now that I wear my contacts more, I'm in a field where I have to look more professional and thus be conservative with my make up I stick to essentially what I am wearing above. The Marylin Monroe "Bedroom Eyes" look with, you guessed it, powerful lipstick.

Now I have one other lipstain from Sephora Collection's Lip Stains and I like it. It is almost flesh tone but has a slight sheen to it so that you can tell I am wearing lipstick just not very much and it basically NEVER comes off. Well, I decided to try Sephora's Lip Stain in a bright pink because all my other bright pink's come off at some point. 


The one I selected was one of Sephora Collection's Cream Lip Stain in Forever Fuchsia. It's so pretty and very vibrant. The only downfall is that it slightly dries out on your lips and makes them look a little chapped. Make sure your lips have fully dried and add some clear gloss. That will help. But I can go through having a strawberry margarita and eating a flatbread pizza without it budging even a bit. Some does come off into your food and you'll notice it when you first wear it because you'll be looking for it but it won't be noticeable to anyone else (and that's a good thing)!

I also thought I should inform you guys that I get paid Thursday and Thursday night I will be picking up my lovely Nikon D5100 :) NO MORE CELLPHONE PICTURES GUYS! It also takes some HD video, so maybe I'll upload a make up video tutorial for you once a month. Would you be interested in that? Comment below and let me know.

What kinds of make up are you interested in me reviewing?
Do you have a favorite make up item right now?
 

Make Up Monday: Review of Date Night Make Up

So Friday I had a date... and the Saturday before I had a date. I'm trying to have a life again. I'll blog about that later. Today it's my first official post since my hiatus and it's make up monday so we're going to post about make up. Not dating. Sorry.


This is the photo I posted on instagram. Still working on getting that camera. Two more "payments" a.k.a saving $250 from each pay check and I'll have it. Baby steps. But let's focus on me and my face for a second.

First off notice my eyebrows - I waxed them. And by I waxed them I mean I paid Tracey, the lovely lady at the nail salon I always go to, $10 to rid my face of my Frieda Kahlo eyebrows and give me those beauties.  I tried to do them myself with some home waxing kit I got at wal-mart. Do not buy the Salon Perfect No-Heat Wax. It does not work. The wax goes on, the sheets take the wax off but no hair goes with it. Waste of your $5.

I did, however, buy the eyebrow pencils and I used them here. I like them. It's only $3 and you get two pencils and I didn't have a problem. They also kind of act as a gel so if you have some wonky eyebrows then this will help you out.


Next up I tried a BB cream for the first time. I picked up Loreal's and I got it in medium. Awful thing about getting make up at Wal-Mart or Target is most times they don't have testers so I had no clue what I was in for. Let's just say I'm never buying foundation again and I'm just going to stick with a BB cream. First off I wasn't expecting what came out of the tube. LOL. It's white and has what looks like micro-beads in it. Those micro-beads are actually what holds the pigment and when you rub it on your face they change into a shade that matches your skin tone. So don't be put off if the BB cream only comes in 3 shades like Light, Medium and Dark as they change to blend with your skin tone. But I noticed smoother, more even skin tone and it has SPF and moisturizer in it so I am using less products in the morning. At night I take my make up off and put on a night moisturizer and then in the morning instead of washing my face, putting moisturizer and then concealer and then primer then foundation I just put the BB cream on and BOOM. I'm done.

The other things I am wearing here I have reviewed before. My foundation is from Sephora, my eye liner is GOSH, my lipstick (barely visible) is my Sephora lipstain.

So that's it for Make Up Monday. Starting out small. Coming up I have some lip tar to review and Kat Von D's Tattoo Concealer!  Oh and in case you were wondering the date went well. ;)

Are you glad I'm back?
Did you even notice I was gone?

Make Up Monday: Get the Look

Happy Monday, how you guys aren't too sleepy from watching the Oscars all night. Who do you think were among the best dressed? Jennifer Lawrence and Sandra Bullock were flawless like always. I liked Jennifer Garner's look from the front but the back had way too much frill going on. If it was subtle from the waist down it would have been perfect. But enough about the fashion this is MAKE UP Monday.

Anyways I have something kind of special for you. I've been running out of ideas for what to do for these so if you have any let me know. I decided this week to do a Get the Look kind of Make Up Monday. Last week I went on a trip with my mom and my grams to a casino and since we were going somewhere I decided to dress up a little.

Here's how I did my make up:


And here's what I used to achieve the look:


First off the night before and morning of I used Crest White Strips to whiten my teeth and get them super white. Then I washed my face doing my usual routine, then in the order I applied them I used,
  1. Smashbox Photo Finish Light Primer
  2. Sephora Foundation
  3. Maybelline Eye Brow filler
  4. Kat Von D's Eye Pigment
  5. MAC Waterproof Liquid Eyeliner
  6. Neutrogena Lip Gloss
  7. Maybelline's 14 Hour Lipstick
  8. Love & Beauty Blush from Forever 21
  9. Maybelline's Mega Plush Gel Mascara
  10. Urban Decay De Slick
  11. As needed - Sugar Lip Treatment by Fresh Lips in Rose
So that's pretty much it. I like to put some lip gloss under my lipstick if I know it is going to dry out my lips and then I used the Sugar Lip Treatment in Rose over it because it was already tinted pink so over pink lipstick not that big of a deal.

What's your favorite product right now?

Make Up Monday: DIY Sea Clay Mask

Holy crow, Make Up Monday and a DIY in the same post? GET OUT OF TOWN. No seriously, I have been slackin' major on the Make Up Monday posts. I really am just super consumed with other projects *cough*Spellbound Soaps*cough* and blogging is on the back burner. :/ But I shall make it up to you today because I am going to teach you how to make your own mud mask!


Sea Clay, also known as Dead Sea Clay, makes for a fantastic facial mask and it's something I use in my soaps. For example, my Green Monster Bar is made with sea clay and naturally colored with it. Sea Clay has high levels of calcium, potassium, magnesium and sulfate, making it fantastic for the skin & ideal for a face mask. The bonus is that you can tweak this in any way you'd like, using products that are geared towards your specific skin conditions. If you'd like some anti-aging melt a little shea butter and mix the sea clay with shea butter. If you'd like to tighten the skin mix in a little bit of ground coffee (the grinds will also exfoliate your skin). The most important ingredient is the Sea Clay. It will cause the mask to dry on the skin and give you the consistency you want in a facial mask.

Sea Clay Mud Mask
For this particular recipe you will need:
  • 1/4 Cup of Sea Clay (Bentonite and Kaolin are also good alternatives too)
  • 4 Drops Eucalyptus Essential Oil (Optional)
  • 2 tsp. Water PER treatment 
  • Other optional ingredients to add to your mask mix: 2 T. Dried/Ground herbs, 2 T. milk powder or 2 T. Honey.  
  • You can also replace water with milk, herbal tea or aloe vera juice.
A word of caution before you go mixing a bunch of stuff together and glop it on your skin. If you have sensitive skin, don’t mix too many ingredients that you’ve never used before.  Do a test spot. The best place is in the crook of your arm. If no irritation occurs proceed with an application on your face. It's fun to play around but no one wants to make something that irritates or makes their face swell.   Try this basic recipe the first time and then add or replace one ingredient at a time. For example, powdered goat's milk is great for the skin and could be used as a substitute for water (you'd actually add it to the water but go with me here). Don't add honey, goats milk and green tea to the mix and put it on your face. First try a treatment with the goat's milk. If everything works out fine, next time you do a treatment add the honey. Then switch out the goats milk and honey and try just the green tea.

Steps:
  • For each application use a 1:1 Ratio. That is mix 2 tsp. clay mix with 2 tsp. water (or alternative liquid).
  • Apply to skin and let dry for 5-15 minutes. 
    • For sensitive skin, leave on for less time (5 minutes). 
    • If you have oily skin, keep on longer (15 minutes). 
  • Rinse with warm water and moisturize.
VIOLA! You are done and you should have lovely skin to show for it. I would do these at max once a week. You do not want to over work your skin.

If you cannot find Sea Clay, Benonite or Kaolin clay at your local health food store (I'm about 85% sure that Whole Foods does not carry these and I know Sprouts doesn't. I have a "Mom & Pop" that carries Sea Clay and Benonite but no Kaolin down the street.) then I would order some online from one of these suppliers:
  • Wholesale Supplies Plus - For every dollar you spend you get a rewards point that you can later use to purchase items with.
  • Brambleberry - they give out free fragrances every month which is lovely. Also, if you have any questions Anne-Marie (owner & CEO) is VERY on top of social media. She replies to most tweets and youtube comments.
  • Soap Goods - They don't offer incentives but have a HUGE selection and great prices.

Have you ever made your own beauty supplies?
If you make this, tweet me pictures!

Make Up Monday: EOS Lip Balm

I have looked at and wanted to try the EOS Lip Balms ever since I first saw them in Target. Their weird egg-like ball shape has me captivated. Some lip balms come in tubes or in pots but these are round and unique. I really think that is my attraction to them aesthetically.
The EOS (which stands for evolution of smooth) lip balms are 100% natural and 95% organic lip balms. The flavor I have is pomegranate raspberry and comes in a dark pink to fushia ball (?). I like this one in particular because it has shea butter and jojoba (HO-HO like Santa not JOE-JOE). Pure shea butter considered to be high in vitamin/mineral content which is thought to benefit dry skin. Shea butter is one of the best moisturizing, anti-aging regenerating and protecting natural products in the world. It protects your skin from UV sunlight, harsh climate, dehydration, pollution damages and could be the best anti-aging agents for your skin.  I use it in my soaps as a moisturizer and even use it by itself for my own dry flaky skin sometimes. 

Jojoba oil is actually not oil but rather an array of wax esters and practically liquid gold right now (expensive). Moisturizes skin while providing a soft, silky feel. Thought to improve skin elasticity and and is actually the closest natural thing to the skin´s sebum and therefore it can penetrate deep into your skin. Jojoba oil is extremely beneficial for oily types of skin with acne, blackheads, heat rashes, seborrhea and other problematic skin conditions because it tricks the skin into producing less skin oil which clogs the pores. While this isn't exactly something you need to worry about on your lips, I use it as an ingredient in my soaps and thought I'd share my knowledge of what Jojoba can do. It's my favorite oil to use and because it replicates the natural oils in your skin it's pretty good to have on your lips.


It glides on nice and smooth and doesn't feel clumpy like other chapsticks can. It also doesn't taste terrible. Sometimes when you have something on your lips like lipstick or gloss or chapstick and you accidentally forget for a moment and lick your lips you are stuck with an awful taste in your mouth. While this isn't the most important quality to look for in a lipstick it is important to some people and actually does effect whether or not they are willing to purchase a lip product. If it's going to be close to your mouth and there is a chance that you might ingest some wouldn't you want it to be pleasant?

This is another reason that I like what is on the ingredient label. I want to know that even if it's a tiny bit, I'm to ingesting a bunch of harsh chemicals. Especially if it is something I like and use repeatedly. Eventually I might ingest enough for it to be harmful. These ingredients are actually not too far off what I put in my soaps. There's olive oil, beeswax (which means they are NOT vegan), coconut oil, jojoba oil, shea butter, "natural flavors"  (could really be anything), Stevia, Pomegranate oil, Raspberry leaf extract, Sunflower oil and tocopherol (preservative often used in food and cosmetics).
To top it off these are made in the U.S, certified organic, gluten free and is not tested on animals. Being a vegetarian it is important that if the product isn't vegan then the products must also not be tested on animals and if it is necessary to extract something from an animal that it be done in a positive and in a non-life-threatening manner.


I full enjoy the lip balm and believe I will continue to use it. After wearing it for a few weeks I feel the amount I have had to apply it has decreased and that it is actually healing my lips.


Have you tried EOS lip balm?  If you did, did you like it?
If you haven't, what brand do you use?

Make Up Monday: Birds & Oxfords and Influenster Oh My!

Watch me get a little crazy in this video showing what I got from the ladies at Birds & Oxfords as well as my Make Up Monday review of NYC's Liquid Lipshine in Nude York City from Influenster.


Thank you Andra and Deana from Birds & Oxfords, I love my gifts! <3

NOTE: I was sent the NYC Liquid Lipshine courtesy of Influenster as part of a trial. See that blog here.

Have you ever tried NYC brand Make up?
Did you like it?
What do you think of this product?

Make Up Monday: Influenster Swag (SPONSORED POST)


I can't wait to review these cosmetics for Make up Monday. I'm also thrilled about the oatmeal. Yay free food! Doesn't food just taste better when it's free?

I'm really upset at how fat I look in this video. My mom started me on her Herbalife diet because Regina George have one thing in common right now and it's the line "Sweatpants are all that fit me right now." and that shit is unacceptable! I weight 187! I weighed that in high school and I was down to 145 my freshman year of college. I'm just sick of being "fat" and not fitting into clothes I bought 3-4 months ago! Ugh. So with this diet I drink 2 shakes a day, take a shit-ton of vitamins and then can eat whatever I want for dinner. The cookies-n-creme shake is really good but I HATE the vanilla. My mom ordered chocolate for me to try and a mint chocolate for all of us to try. All of us being her fiance, herself and myself. Her fiance lost almost 80 lbs and she lost 30lbs on it. So I'll let you guys know my progress and if you'd like to order any of it I'll hook you up with my mom's information since I'm going to be doing her website and her marketing. ;)

Alright, I'm getting off to go show the house since some people are coming to look at it. Kinda bummed about that, look at my amazing green walls! Those took me forever to paint! haha.  

Which product are you most excited for me to review?

Make Up Monday: Beauty Awareness

Hi guys, by the time you are reading this I am traveling north from Tampa on U.S Highway 19 towards Tallahassee. From there I will pick up Interstate 10 and it's a straight shot from I-10 in Tallahassee to Los Angeles.  The trip should take me 3-4 days but I'm hoping it's closer to 3 days this time.  I'm super bummed I don't have my camera yet though. Going to take pictures on my ancient point and shoot. Hope some of them turn out ok.

So as you can see blogging will not be that easy from the road. Thank goodness for technology because I scheduled this post over the weekend! I'd never abandon you, even if it was for the open road! This just means that I won't be able to reply to your comments right away but if you follow me on Twitter you'll see my instagrams as well as me tweeting updates from my phone. Most likely while I'm filling up at Gas Stations or being a silly tourist.


Anyways, today I wanted to talk to you about beauty awareness and not just being aware that you're beautiful! I am talking about knowing the ingredients of your products and knowing if they are tested on animals, if they come from animals, what kind of chemicals are used and what those chemicals can do to your body.

For example, I already talked about parabens when I reviewed Yes to Cucumbers Facial Towelette's.

"Parabens are not bad parse but for most people they aren't good. There's a lot of debate on whether this preservative causes cancer or leads to hormonal imbalance (because it is said to mimic estrogen) and I already have the whole hormonal imbalance problem and I'm not trying to exacerbate it."
Now the reason I'm so into this is because I have been using some facial products for a long time and some not so much but I've noticed a trend in what seems to make my face break out or thanks to that lovely hormone problem I get facial hair. Not just peach fuzz, even though I have that too, but I am talking about chin hairs. To the point of almost having a full on beard if I let it go. A lot of people have the mustache problem but few have to deal with looking like the bearded lady! So I started to look at the product labels of what was in the products I was using most often. Which lead to research on what those ingredients are, what they are used for and the effects of their long time use.

Two of those chemicals I researched was Sodium Lauryl Sulfate (SLS ) and Sodium Laureth Sulfate (SLES) because both can be used in soap making. If I'm putting it into my soaps I want to know what it does. I don't want to give it to my friends and family or worse sell it to someone I don't know who will turn around and try to sue me because the product I sold them had some shoddy chemicals in it! The reason they are used in soaps, shampoo's, body scrubs and the like are because both chemicals are very effective foaming agents, chemically known as surfactants.
"Although SLES is somewhat less irritating than Sodium Lauryl Sulfate, it cannot be metabolized by the liver and its effects are therefore much longer-lasting.

A report published in the Journal of The American College of Toxicology in 1983 showed that concentrations as low as 0.5% could cause irritation and concentrations of 10-30% caused skin corrosion and severe irritation. National Institutes of Health "Household Products Directory" of chemical ingredients lists over 80 products that contain sodium lauryl sulfate. Some soaps have concentrations of up to 30%, which the ACT report called "highly irritating and dangerous".
Shampoos are among the most frequently reported products to the FDA. Reports include eye irritation, scalp irritation, tangled hair, swelling of the hands, face and arms and split and fuzzy hair. The main cause of these problems is sodium lauryl sulfate." - Natural Health Information Center
So basically, make sure that your beauty products do not contain these chemicals! Can't be metabolized by your liver? Your liver filters out all the bad things out of what you eat and drink (hence why alcoholics tend to have bad livers) and if your liver can't handle it your skin, the largest organ on your body, sure as hell can't handle it either.

Before I started making soap and went into researching products and developing my own I didn't know any of this. I had no clue what I might be using was bad for me. I don't want to put anything containing SLS on my head or on my skin. I promptly threw out tons of product this weekend in an effort to be more health aware and to save space in my bathroom box (the box is huge and takes up my whole bathroom - my room mate joked that all I left was the toilet).

The other chemical I researched was petroleum (also listed as mineral oil, paraffin wax, and petrolatum [slick change there] to name a few). Yes, the same thing that is used to make plastic bags and make your car run. This stuff is actually used in a lot of different products. I discovered it is used in carpeting. Who would have thought that black grimey stuff on your car was also on your carpet? Ugh, I don't want to set Ivory on it anymore. HARD WOOD FLOORS PLEASE!


I researched it because it's often used in soaps and other beauty products but the reasons why it's actually harmful are easy enough to see. Oil in your pores is something you typically want to get rid of right? Because it leads to acne. Well, the oils that occur naturally are ok for your skin. Some are even extra helpful like Olive Oil or Sweet Almond Oil. "Mineral Oil" actually smothers your skin and makes it hard for the skin to breathe. If your skin is smothered then nothing else can get in like your natural oils and nothing can get out like toxins. Petroleum also slows the rate at which cells are renewed, thereby damaging collagen, connective tissue, and elastin - all of which contribute to the way skin looks and feels. So you end up getting wrinkles a lot faster. Everyone remember my "OHMYGLOB I'M GETTING OLD" post? Yeah, crows feet, laugh lines, forehead wrinkles, saggy necks, all of that can be due to using petroleum in your beauty products. It's kind of counter-productive to use beauty products containing a chemical that ages you AND anti-aging creme right? THROW THAT SHIT OUT.

Also, National Geographic Green Guide states that "petroleum distillates" are possible carcinogens, meaning that they can cause cancer. Yes, I'm aware that EVERYTHING causes cancer now. You can look at a cigarettes ad and end up with lung cancer, I get it. But honestly, do we want to help death along? I mean, if you're into that thing go for it. But I'd kind of like to see what life has to offer me and I'd rather not do it looking like the Crypt Keeper or a pug at 25.

(Information on Petroleum came from Natural News)

Go grab any beauty product you have and see what ingredients are in it. If you come across something you've never heard of write it down and research it before you use that product again. It is completely worth it to avoid things that are harmful to you. I know that takes the fun out of buying beauty products but really, is your health worth it? If it is, go for it but for me I'd like to be healthy. If I am healthy rather than model size and magazine pretty then that's fine by me. 

What's in your beauty products?

Make Up Monday: GOSH Eyeliner

Ugh how is everyone's Monday? As cheery as mine has been? Surely not since I gave my notice at work and have been frantically trying to get this place in tip-top shape for the next girl to take over my spot.
But have no fear, I have a special discount code for you today from my affiliate Bauble Bar! Today 12/10/12 ONLY, they are offering 25% off site wide with code HOLIDAY25! So head over there and get those last minute stocking stuffers!


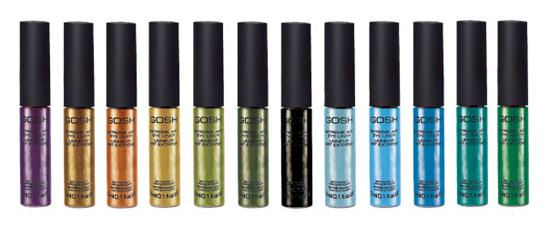
Anyways, onto the make up. This week's Make Up Monday is covering some of my favorite eyeliner. I don't wear it often because I can't get it at a store in the States. My friend Lor[eana] turned me onto it when I was raiding one of her many make up bags. I guess I should explain. Lor and I met online and came together for an event. She is from Canada and works in the make up department of a popular grocery store or retail outfit, who cares. I needed some eyeliner that had staying power and she goes "oh this will be perfect. I can't even get it off with make up remover sometimes." See, I have this funny problem where my eyeliner collects under my eye unless I put a ton of product or continually check my eyeliner. I put it on and sure enough for the next two days I had PERFECT eyeliner even though I slept in it. What is this miracle product that every concert-goer should know about?


It's called GOSH, which is a cosmetics company from Denmark but the website lists Ireland as its headquarters and has an Irish URL (so confusing). You can buy them directly from the company's website (if you're in the States, you'll need to convert to Euros) Although I was able to find it for sale on Superdrug.com (but the amounts are in GBP & sometimes it's cheaper)

The product description from Superdrug reads:
It dries very quickly and will not fade or smudge. The super skinny tip makes the application very easy. The ingredient combination of this product provides an intense shine an extreme long-lasting-wear. GOSH Long Lasting Eye Liner is now available in 8 fantastic colours. The optimal drying time allows the product for blending.
Now, I'm not too sure about the blending part. It goes on very thick. I usually use an eyeliner brush rather than the applicator but you have to be a pro to wear this stuff because one mistake and it is there for days. I've tried fixing it with a q-tip but it didn't help too much. I actually used this for my Halloween make up this year. So you can see it looks fine once applied. I typically save this for concerts or events where I can't be worrying about eyeliner weeping down below the outer corner of my eyes.

I didn't know it came in different colors though. I might have to send funds to Canada aye? They also have eyeliner pencils but I am not sure as to their staying power. I may have to look into it.

Have you ever heard of GOSH?
Some people are scared to try it because of it's lasting power. Are you?

12 Reasons to Avoid Black Friday & Enter My Giveaway Instead.

How many of us are regretting not stretching before running towards the items we wanted today after gorging ourselves yesterday? Or are sore from sleeping on the ground outside our favorite establishments for those door buster deals? Yeah me neither.

I worked in retail and I hate Black Friday. Stupid consumerist holiday, literally. I promised myself after Borders closed (which always had the easiest Black Friday in retail) that I wouldn't work another Black Friday. Well, I lied. Last year I worked at Best Buy. Even when I didn't have to work Black Friday I never participated. I come from a family where we have no money for x-mas presents ever. We celebrate with family and I almost always have my presents done by October because I don't want to deal with holiday retail. If I could avoid going to the store during Nov-Dec I would.

Anyways onto the real reason you are here. Back in the beginning of the month I began compiling some things for a giveaway. A massive giveaway full of all sorts of goodies with the intent of giving them away for X-Mas, you know, as it is better to give than to receive. I began to think, what could I give people for the holidays? I'll give you all of my favorite things!


Here's what you get:
  1. 3 Sample Packets of Murad's Anti-Aging Moisterizer with SPF 20 for Acne Prone Skin
  2. 1 Package Accent False Eyelashes
  3. 1 NYC Nail Polish in Lincoln Center
  4. 1 Sephora Brand Liquid Eyeliner in Black
  5. 1 Maybelline's Mega Plush Gel Mascara in Very Black
  6. 1 Elf Eye Pack with 2 Eyeshadow and Eye Primer
  7. 2 Handi-Bacs from Bath & Body Works (Fresh Strawberry and Market Fresh Apple)
  8. 1 Ed Hardy's Love & Luck Bath & Shower Gel
  9. 1 Yes to Cucumbers Make Up Remover Towelettes for Sensitive Skin
  10. 1 White Rain Rose Soap from my homemade soap collection Spellbound Soaps
  11. 1 Eucalyptus Peppermint Bar of Soap from my homemade soap collection Spellbound Soaps
  12. 1 Month Large Ad Space on My Blog
That's a lot of stuff. I hope you're excited! Due to postal regulations this contest is only open to U.S (Alaska, Hawaii & Puerto Rico ARE included) & Canada residents. Entering is simple enough. Complete the tasks below and I will pick one winner to receive all of this loot!

a Rafflecopter giveaway

What non-material thing would you like for the holidays?

Make Up Monday: History Lesson

Recently I've become more of a history buff. I love learning and since researching my family history is heavily on my mind this holiday season I thought why not research the history of Make Up for Make Up Monday?

Here are some fun facts (?) about make up!
  • Egyptians thought being beautiful was how to get closer to the Gods
  • White powder was used to whiten up the complexion of the Chinese, Japanese and Greek women.
  • Cleopatra had her lipstick made from crushed cochineal insects, which gave a deep red pigment, and ants for a base. 
  • Around the 3000 BC, the Chinese invented nail polish.
Obviously none of these pictures are mine but here's some famous make up looks from the 1920's up until today:
1920's Make Up
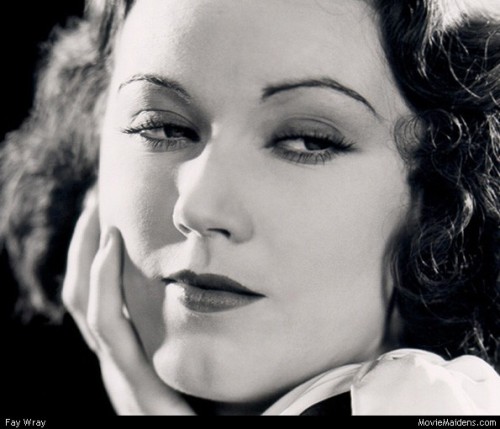
1930's Make Up

1940's
1950's Make Up
1960's Make Up
1970's Make Up
1980's Make Up
1990's Make Up
2000's Make Up
Today
Crazy how styles for popular females from these time periods fluctuate and recycle. From conservative to radical and back again. Then depending on the scene (movie set, music video, award show, ect) how it changes. So insane.  That's it for this week's make up Monday. Enjoy.

What's your favorite time period for hair and make up?

Make Up Monday: How To Apply Fake Lashes

So for Halloween I wore some fake lashes and I decided to do a little how to on how to apply them. It's surprisingly simple and I did it in about 10 minutes. Now, let me tell you that it was so hard for me the first time that I had to have a friend apply eyelashes for me. But after reading a few other how-to's and watching countless youtube videos I was able to do it in a snap.

1. Eye Lash Glue - Duo $8 Sephora
2. Bobby Pins - $1
3. False Eyelashes - About $4 from Target
You'll also need a paper towel, qtips and eye make up remover.


 I use Duo eyelash glue that can be purchased at Sephora for $8, bobby pins cost about $1 per pack and these eyelashes are actually just accents that do not cover the full eye (which I highly recommend for new false eyelash wearers) that I purchased at Target for about $4.

First thing you want to do is clean your face and put NOTHING on. I mean it. No moisturizer, no foundation, nothing.  Then if you're like me and have bangs or hair that gets in the way, pin it off your face with the bobby pins. It's also helpful to do your hair after you do your make up.

Creepy eye close ups you guys, apparently I'm a fan? NOT!
 Next, remove your eye lash from the package and hold it over your paper towel or I had to use a Kleenex. You can either squirt the glue onto the towel or apply it directly to the eyelash. It doesn't really make a difference which eye lash you apply first. That is up to you. I always start with my left.

Look at the icky glue to the side. WTF?!
 I drag the part of the eye lash that will go on my eye through the glue so that it is very fine. Below you can see how there is more on one side than the other because of that. You can take a qtip or your finger and wipe the extra off the lash. Then just wipe your finger with some make up remover. If there is glue on your fingers and the eyelash and you go to apply it, it's going to stick somewhere and probably not your eye so be careful.

After you've applied a thin bead of glue, wait at least 15-30 seconds. You want the glue to start drying BEFORE you apply the lash. Otherwise it'll just slide around on your eye. This is also why you don't apply anything like moisturizer to your eyelids because the glue will adhere better to dry, clean skin.


This is the tricky part. If you're like me and you blink a lot you're going to have more issues with this. I'm a contact lens wearer so I've been able to train myself not to blink when things are coming straight for my eye. Yet, I still had some issues applying the first lash. It happens. Just keep trying.  Be sure to not close your eye fully.
Go at your eye gently, getting the fake lash as close to your natural lash line as possible. Hover just before making contact and then let it touch your skin and gently let it rest on your eyelid before gradually applying more pressure.

A tip: You'll probably have glue all over the eyelash and your fingers. Use a bobby pin to apply the pressure after you've placed the lash so that it doesn't stick to your finger and come off your eye.

KEEP YOUR EYES OPEN! If you close your eyes, the glue will reach your bottom eyelashes and before you know it you will have effectively glued your eye shut. If this happens don't panic. Make up removing wipes will get the glue off. Then you can wash your eye and try again.


Ok, see that horrible white stuff? Yeah, that's the glue. It's white in the bottle but it will dry clear I promise. I fully intend to cover it with black eyeliner and mascara anyways but if you don't then don't panic. It looks crappy now but it will change.

After you've applied one eyelash, you'll want to do the other. Unless you're going as a pirate and are covering your other eye. Just repeat the same steps as before. It should come a little easier than the last one now that you know what to expect.


As you can see, my right eye lash looks much better than my left. Mainly because I had less trouble with it. Not a big deal because like I said I'm going to cover them up with make up. Make sure you blink a bit so that your eyes get used to the foreign feeling. It'll feel really feathery, like there are butterfly wings attached to your eyes. If you have accents on like I do or fancy ones that protrude from your eye quite a bit you'll probably see them when you blink. Neat huh?

CREEPY EYE CLOSE UPS!
I actually didn't hold Ivory as much as I thought I would. This made my eyes feel extremely heavy. Almost like I taped my eyes slanted. You know, that horribly offensive thing little kids do to give themselves the shape of Asian eyes?  It felt like someone was doing that for a good hour after I have them on.

Next, do your make up. Add your eyeshadow, eyeliner and mascara as usual. Make sure to still curl your eyelashes. Doing this and adding mascara will help blend your natural lashes with the fake ones and help to prevent the fake ones from falling off if you didn't use enough glue.


VIOLA! You are done. Cute little "bedroom eyes" from the 1950's. Forgive the rats nest that was my hair. I hadn't brushed it out after I took the bobby pins out. I ended up curling my bangs and such. Well, you remember right?

Now these were just little accents. Sara Lyon has a BEAUTIFULLY self-illustrated how-to apply lash extensions tutorial on her tumblr and by self-illustrated I mean she's a wonderful graphic designer who saved herself the creepy eye close ups by using photoshop to make illustrated graphics to go with her tutorial. It was a combination of her tutorial and Kandee Johnson's Youtube video tutorial on how to apply false eyelashes that helped me apply mine in record time and on the first try!


Do you like fake lashes or are they too complicated?