Hi guys, look who is FINALLY posting a DIY. Yeah, that's right I said it ME! Last one I did was back in June or July. The funny thing is, I've done about tons of crafting DIY's since then (like making paper flowers, or racer back tank tops) and none of them turn out! This one is fabulous.
Part sparked by my desire to do more with my soap I was looking for some inspiration for how to photograph and display my soap. I've come up with a cute idea for it based on well, what else, pins from pinterest! Do you follow me on
Pinterest? Should I be following you? Put your URL in my comments.
Pinterest has become a DIY lover's paradise as of late hasn't it? Anyways, I found this
DIY Cake Stand Tutorial from Shelterness and have created my own. Their tutorial is VERY basic. Mine is going to be a little bit more in depth but essentially it will cover the same steps.
Also,
THESE ARE NOT FOOD SAFE! Do not place cakes or cupcakes or any kind of food item on these stands unless you have a paper doilie (Baking isle of Hobby Lobby, Michaels, Joanns or any craft store) or cupcake wrapper on your food products. The chemicals used could be absorbed into the food and could potentially poison you!
These stands were intended to be made for sale display's only. (All of my soaps are
wrapped in plastic to retain their moisture and prevent soda ash,
cracking or contamination).
I went into The Dollar Tree looking only for some ceramic plates and the Candlesticks. You can get the same materials anywhere but for $1 a piece why not? Hence why the post is called $2 Cake Stands. Essentially all you need to buy are the candle sticks and the plates. If you already have the glue and everything else then that's the only thing you'll need to spend money on.
The original tutorial said to use plates. Personally, I didn't like the plates that the Dollar Tree had. Apparently every Dollar Tree has different stuff but I went to 5 and couldn't find any plates that I liked. Remember, I'm going to paint these so to say I couldn't find plates I liked enough to paint says something. Then at the last one I was going to try, the one closest to my house (go figure) had some decorative serving trays. I picked up a silver one. It was lightweight and when I put the candlestick under it I liked what I saw. So I grabbed three. So far I've spent $6 to make a 3-teir Cake stand. Not bad when you try to buy them and they cost $24-$100 at stores. Just type in "ceramic cake stand" and see what Google pulls up. Ridiculous. Anyways onto the tutorial side of things.
You'll need some supplies (most of these you should have already):
- Plate or tray (whatever you plan to use for the top)
- Candlestick (or whatever you are using for a base)
- Multi-Surface Paint or Spray Paint (Needs to work on glass! I am using Americana [Brand] Gloss Enamels)
- Glue (I used a hot glue gun but you could use any kind of super adhesive that works on Glass)
- Paint Brush (if using paint like I am)
- Newspaper or Plastic Bag (to cover work surface)
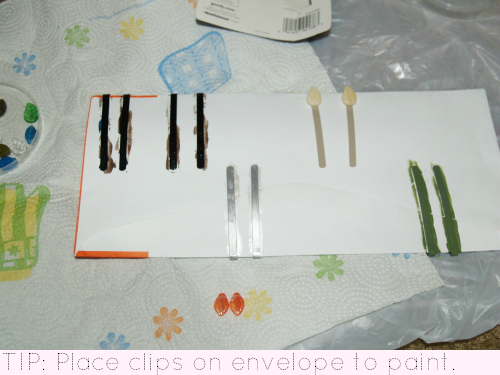
 |
| What I had to purchase (Bottom) Vs. Supplies needed (top) |
First paint the candlesticks. I used 3 coats on mine. I had tons of colors to pick from and I was going to use multiple colors but once I got going with the "Light Buttermilk" I fell in love. Seriously, it looks so cute.
According to the label the paint needs to dry for 48 hours and then bake for 30 minutes at 325. Or air dry for 21 days. WHAT?! I can handle waiting 2 days but 21? Oi! So yeah that wasn't included in the tutorial from Shelterness. Since I didn't use spray paint I'm not sure what you'll need to do but make sure you read the directions and follow them. I have a hard time breathing strong fumes so I decided spray paint was not an option. Especially since I would have to do it outside and it's cold and really windy here. I really don't want to wear spray paint. The paint does have some fumes but nothing the ceiling fan can't take care of.

When painting the candle sticks I discovered a little problem. There's a lot of nooks-and-crannies in it where paint can collect so I worked out a system for painting them. First you're going to want to paint in light layers. Don't worry if there is streaking that will fade with the layers. Paint the bottom circle in a downward motion. Next paint the next "tier" in a downward motion all the way to the bottom. Yeah, go over the part you already painted. Next, paint the skinny middle or "stick" part in an upward motion.
I did that 3 times before I moved to the upper part so it would give me something to grasp. Then once that part was dry I moved to the top. I waited about 10 minutes between each coat.
When I got to the top I ran into a similar problem as the bottom. There are two little ledges or lips to this part and another middle or stick. I painted them the same way. Downward first, then the stick and top lip upward. Then for good measure I painted the top rim.
I did not paint inside where the end of the candle stick would go because it is going to be irrelevant when I glue the candle stick to the platter and I didn't paint the bottom underneath because again no one is going to see it.
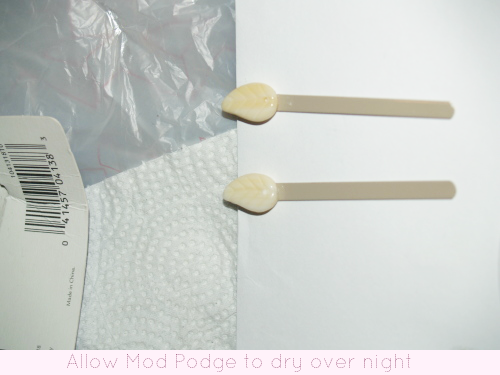
I was going to leave the plates alone and just paint the candle stick but I liked how it looked and I thought the uniform color might be prettier. I was right. I just squirted paint straight onto the plate and used a wide brush to paint it in circles so that the streaks would all be in the same direction. The surface of the plate did not hold the paint well. After two coats it started to flake off. I let this dry overnight and then the next day while I was still waiting for the candle sticks to finish I added another coat. This helped but not by much. Oh well, it's going to be covered anyways. I let that dry over night.
Then as instructed I preheated the oven to 325 and once it was set I placed the candle sticks in oven and let them bake for 30 minutes. As instructed I let them cool off inside the oven - I waited 15-20 minutes before I took them out. I suppose you could take them out using an oven mit or if you placed them on a cookie sheet take it out and air dry but I didn't.
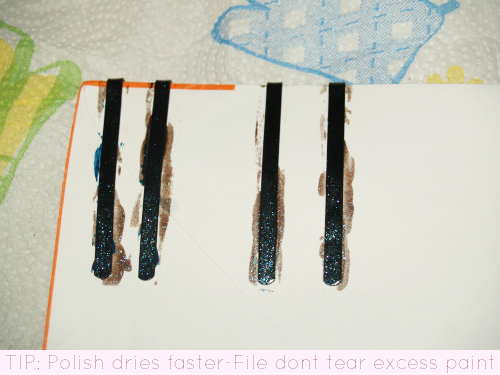
Then I added a nice layer of glitter. I used Martha Stuart's Multi-purpose craft glitter acrylic paints. I mixed a TEENY-TINY bit of the "Onyx" shade with a bunch of the "Seafoam" shade and sparingly painted just the bottoms of the candlesticks.
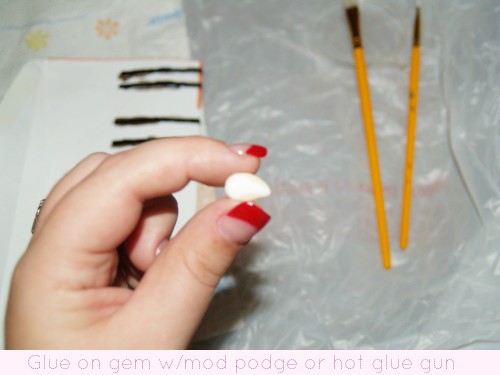
As I waited for that to dry, I turned on my hot glue gun and let it heat up. Once the glitter was dried I took my top and turned it upside down added the hot glue to the top rim of the candlestick and then turned it upside down, positioned it just above the plate into roughly dead center. Once I confirmed that was where I wanted it, I firmly pressed it to the bottom of the plate. I let that sit and repeated the steps with the other two sets.

One tip on the "testing" phase. I used a hot glue gun and since I knew I was going to end up using these as a soap stand I decided to test out their weight capacity. Hot Glue does not hold well. Ok, well, not the tiny amount I used in the picture. I literally spaced out all of my Melt and Pour soaps trying to take cute pictures and guess what happened? BOOM! The back side was heavier than the front side and the tray popped off the candlestick. I decided MORE GLUE was the answer rather than buying a more heavy duty glue. This is my frame of caution to you; I didn't like the look of gluing one on top of the other and I'm glad I didn't. They can't hold much if you're only going to use hot glue and if you are using hot glue - GLUE THE SHIT OUT OF IT. I not only put glue on the rim like above but also on the outside rim on the plate so that it literally is a glue-ring and you can't tell where the plate ends and the candle stick begins. It's underneath and no one can see as shown in the bottom right picture.
Once all of that drama was out of the way I had one thing left to do. Apply a finishing gloss coat. I bought this in a spray so I went onto the front porch, which is open and set up my newspaper. I put the whole stand upside down so I could seal the candle stick part first. In 2 short bursts I sprayed the bottom and let those dry. Then I daringly turned them right-side up and sprayed the top lid. Once that was dry I brought them inside and viola! I am done. *phew*
 |
| TIP: Come back next Friday for a chance to win one of the two gift bags in the bottom picture! |
What do you think of my cake stands?